Attribute table refers to a table that holds non-spatial data. Attribute table can be used for a single row record or aggregate data. It is created from a specific database table or view.
To create an attribute table, follow the steps below.
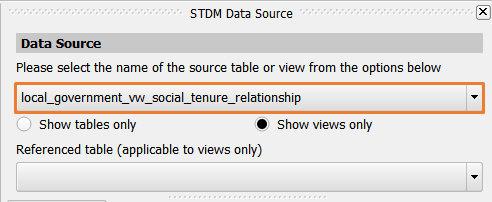
1. Select a data source by choosing a table or a view as shown below.

Note: Only the current profile tables and all views in STDM database load.
Note: When choosing a view, make sure you have chosen the view that is created using current profile tables. You can identify that by looking at the profile name at the beginning of view name.
2. Select a referenced table if you have chosen a view in the data sources (see the image below). A referenced table refers to a table that the template will be working for. In other words, the reference table forces the template to only work for a certain entity. This is useful when Generating a document.
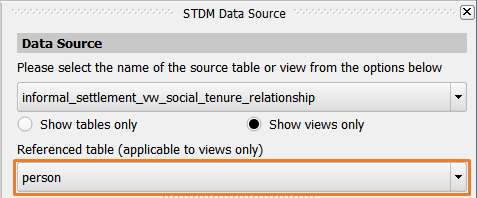
For this demonstration, the Person table is used as a referenced table but you can choose any other based on your needs.
Note: The above two steps are mandatory for views and the first step is mandatory for table data sources.
3. Click on the Add attribute table button located in STDM Document Designer toolbar (see the image below).

4. Start creating a table box by clicking on one point in the template page that will be its top left corner of the table. Then start dragging the cursor to the bottom right direction to expand its size.
While dragging it, you can see a red box and a cursor that looks like the plus (+) sign.

When you release it, a sample table is created (see the image below). This table changes based on your selection in STDM item properties.
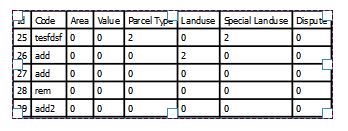
5. Make sure you have selected the table box as shown in the above image. Proceed to open the STDM item properties tab as shown below.
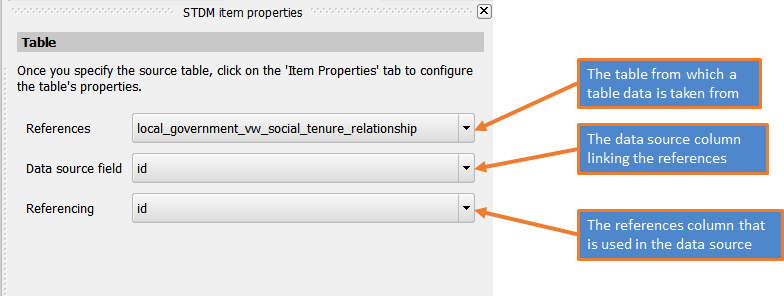
References refers to any table that is used as a data source of the table. Here you will find all tables and views of the current profile. Choose a table that you want the table data to be based on.
Data source field refers to a data source column that is used to link the reference with the data source table.
Referencing refers to the references table column linking the data source, which has similarity with Data source field in its function here.
6. The attribute table is created based on the data source and properties you have set. See an unformatted attribute table below.
The rest of the steps show how you can format the table.
7. Style and format the attribute table. The table is formatted and styled using Item properties tab, as shown below.
See the descriptions on the image below.
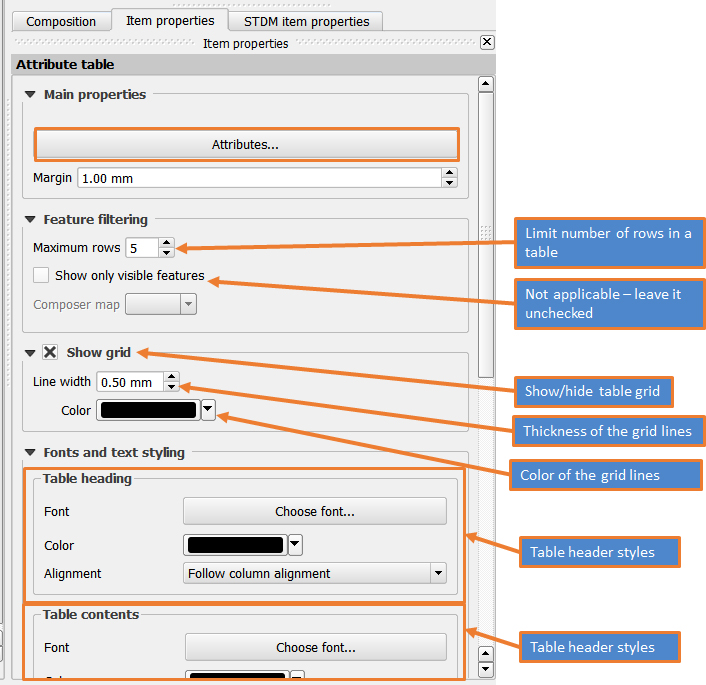
To make style changes, refer to the above image on the Item properties and scroll down to make more changes.
To format the attribute table, click on the Attributes... button that is highlighted in the above image of the Item properties.
When you click on Attributes... button, you will see the following window.
The buttons of Attributes dialog are explained below.
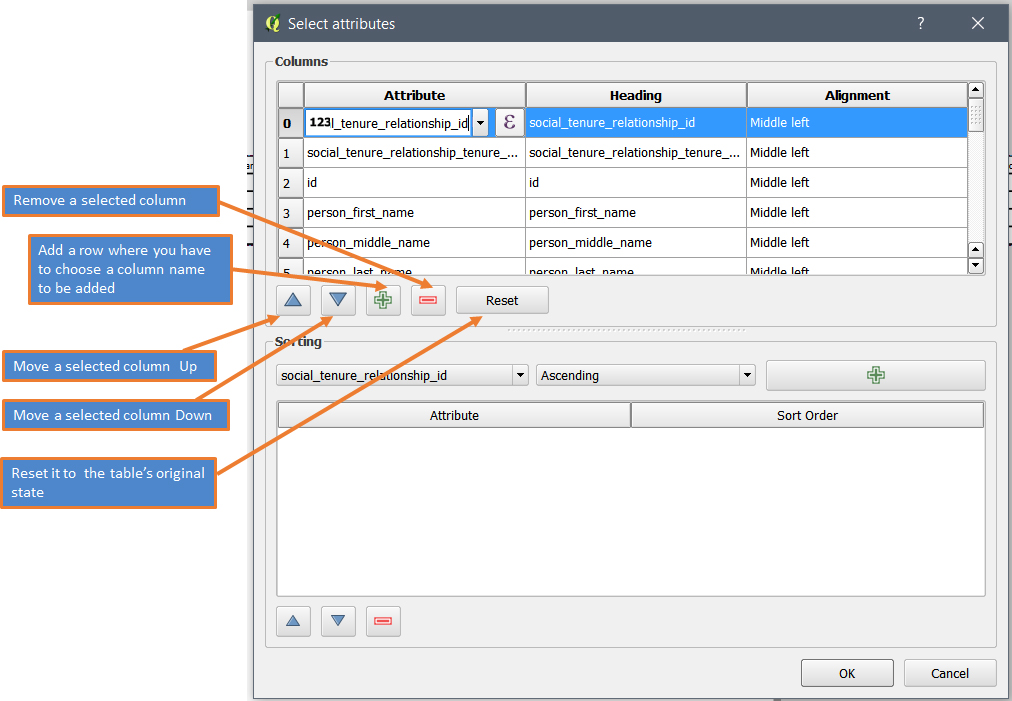
a. Adding a column
By default, all the columns in a table are loaded. You may need to remove unwanted columns to create your final table.
If you accidentally remove columns that you might require, you can add them using the add button as shown in the above image.
An empty newly added column looks like the image shown below.

You then have to choose the column by clicking on and choosing columns from a drop down menu as shown below.
b. Removing columns that are not needed
To remove a column, select on a row and click on the Remove button.
b. Formatting the column names
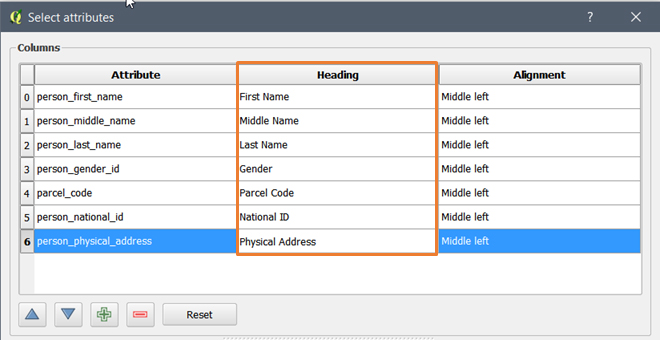
Columns of STDM database or any other database have an underscore instead of spaces and lower cases instead of title cases. This may not be desirable in the generated document.
The appearance of the column can be changed in the Attributes dialog by manually typing preferred heading of the column under the Heading as highlighted in the image below.
c. Change alignment of columns by choosing your preferred alignment under the Alignment column.
8. Once you are done, click on the OK button of the attributes dialog to save and close the dialog. See the image below.
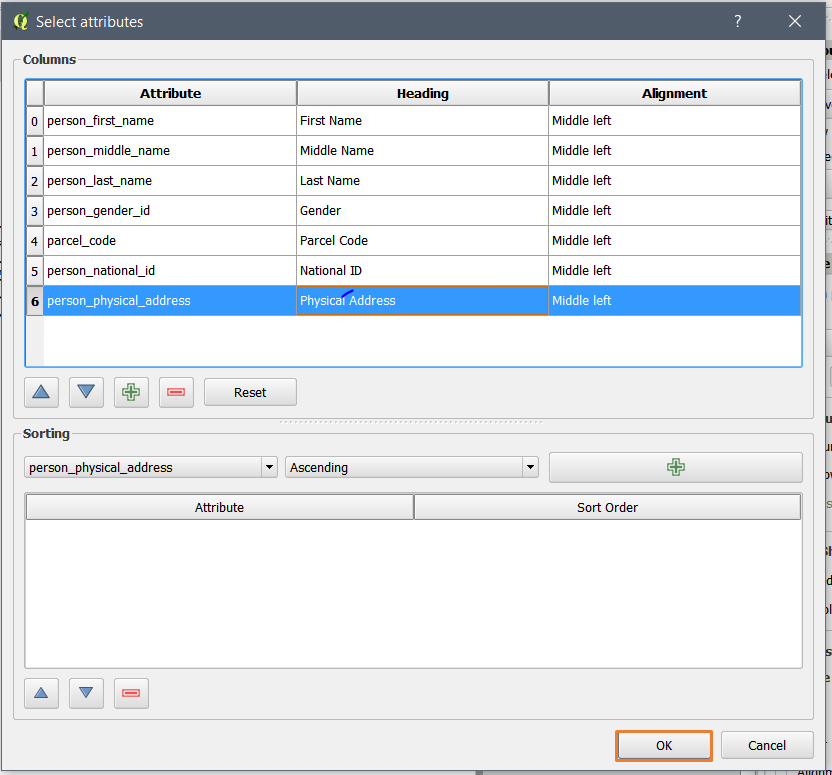
9. Once you click on the OK button, the table gets updated. The image below shows the final table customized on the bases of above steps.
Note: Currently, due to a bug in QGIS Print Composer, the formatting will be lost if you open the template again.
Thus, it is advised to format the table before saving the template for the last time.