GPS Feature Import tool is a special functionality within STDM that allows uploading, editing of GPS field recorded features and saving into STDM Spatial Entity.
GPS Feature Import tool provides the following functionalists.
Upload of .gpx files.
Selection of feature type for the uploaded file.
Editing and visualization of a feature.
Creation and saving of feature attribute data.
The steps below describe the process of importing GPS recorded features into STDM Spatial Entity.
1. Add a spatial entity layer into the map canvas using the steps under Adding a Spatial Entity Layer topic.
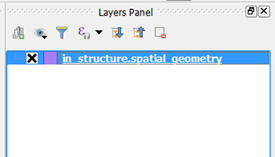
2. Once the layer is added select the layer in the Layers panel as shown below. Click on it to select the layer.
3. On the Spatial Unit Manager, click on the button GPS Import Feature as highlighted in the image below.

4. The GPS Feature Import dialog appears as shown in the image below.
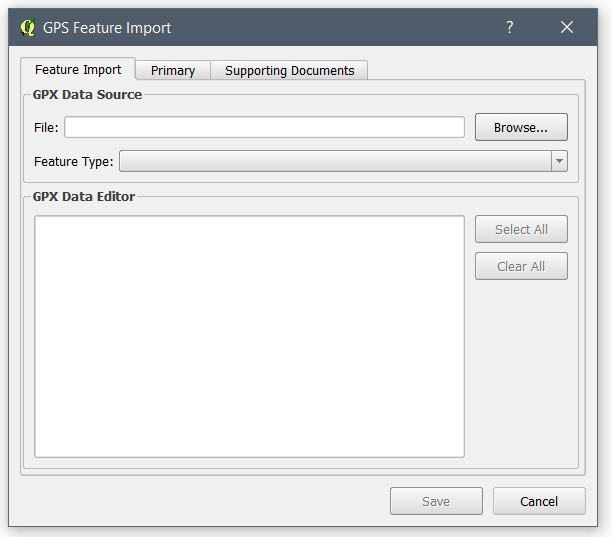
The GPS Feature Import module loads with a Feature Import tab and the Entity Editor that enables you to add a record as discussed in Adding a Record topic.
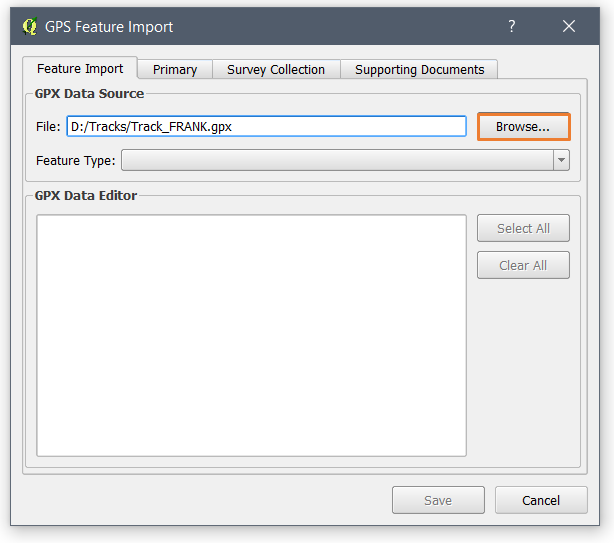
5. Select the GPX file. When you click on the Browse button as highlighted below, a window will pop up to allow you to choose a GPX file from your computer. You can also drag .gpx file into the file path text box. Once you select a file with an extension of .gpx, it will be added in the file text box.
6. Once the Feature Type is enabled, click on the drop-down button to select a GPX Feature type that relates to the added .gpx file as demonstrated in the previous step.
Currently the GPS Feature Import tool supports the following GPX formats;
Waypoint: An individual point among a collection of points with no sequential relationship.
Track: Ordered list of waypoints describing a path or a line.
Route: Ordered list of waypoints representing a series of significant turn or stage points leading to a destination.
When you select a feature type, the following takes place.
The GPX Data Editor box is populated with a table containing points that are in the .gpx file. You can select, and unselect points using the checkbox in the first column of the table.
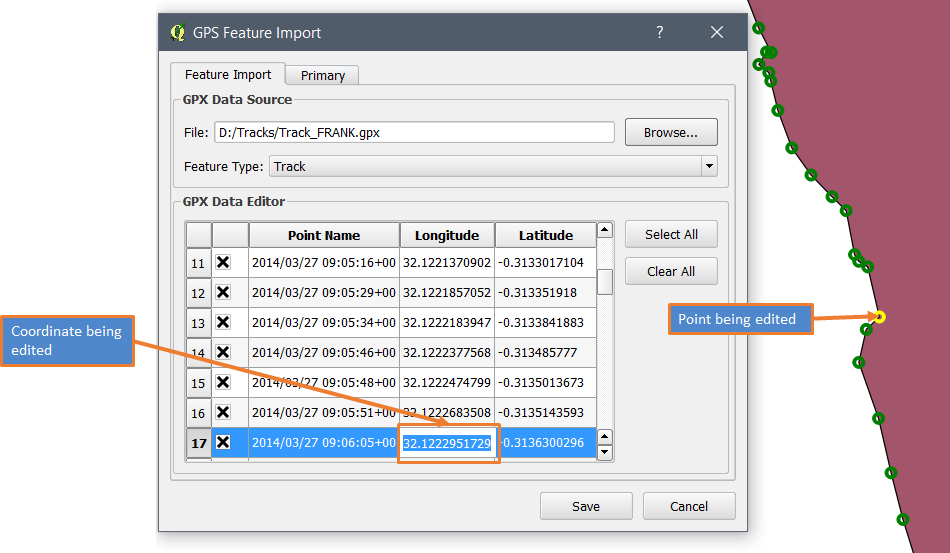
A Preview feature is rendered in QGIS Map Canvas as illustrated in the image below. The Preview feature shape changes based on the removal and selection of points. Highlighted points are differentiated with QGIS default selection colour, in this case yellow (see the image below).
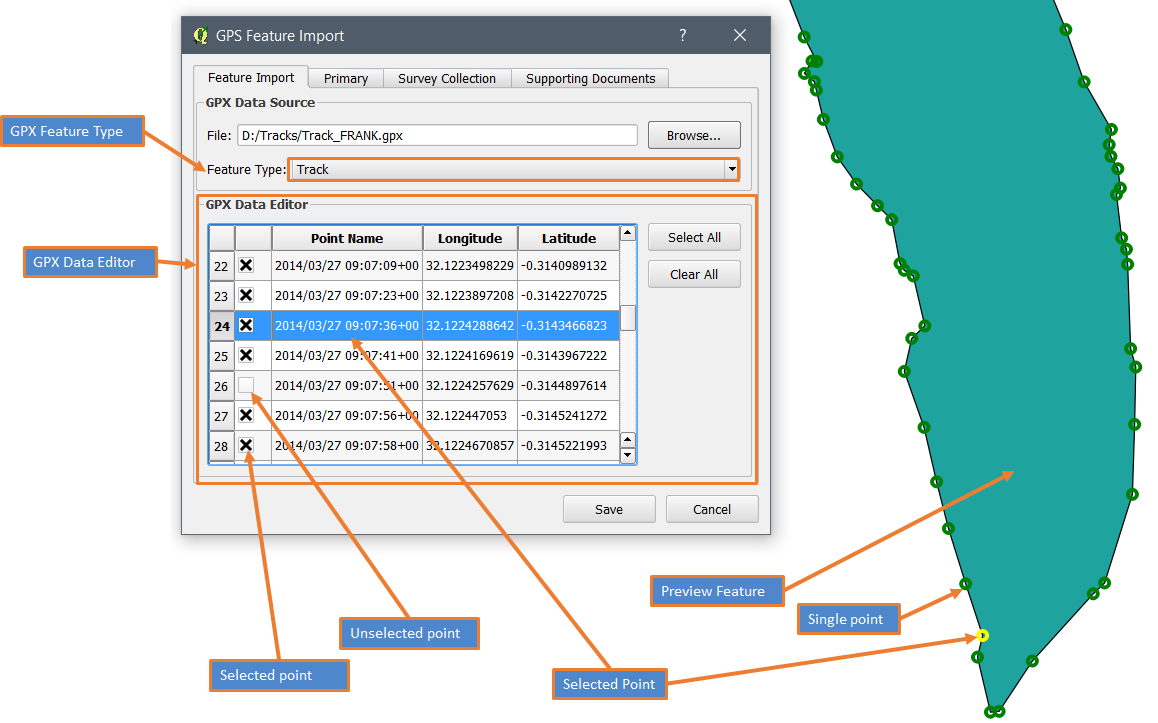
The table enables you to choose points you would like to import. This is achieved by clicking on the checkbox shown on the first column of the table if it is not checked.
Remove points that are not needed or points that are wrongly recorded by removing the selection. To remove the selection, click on the checkboxes on first column.
A removed point, from which the checkbox selection is removed, is also removed from the feature on map. This results in the change in the shape of the feature.
An included point, with a checkbox checked, can be seen with a green round marker on the map, as shown in the figure above. This means that the points with a green round colour will be included in the feature created from the GPS points.
To check all checkboxes, click on the Select All button as shown in the image below. This will redraw the feature in the map canvas showing all the data points. All data points would be imported into STDM if this option is chosen.
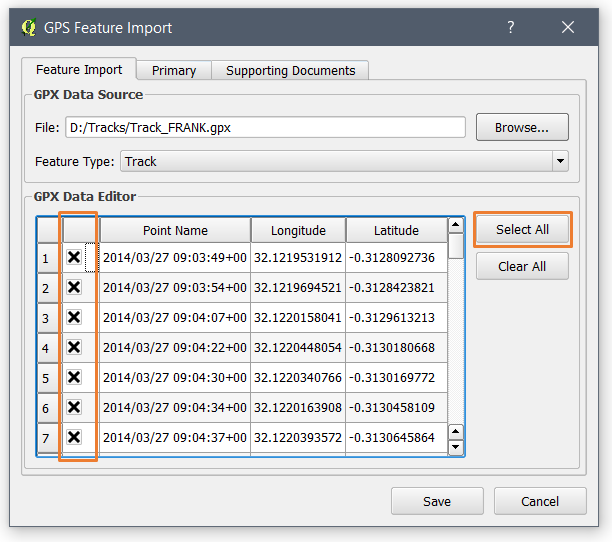
Click on Clear All button (highlighted in the image below) to uncheck all points in the GPX Data Editor and to clear the feature from the map canvas. Doing this prevents you from importing GPX data into STDM as no points would have been checked for import.
![]()
You can also change the values of the coordinates if needed. Double click on a coordinate (Longitude or Latitude field) to change its value as shown in the image below. Complete the edit by hitting Enter/Return keys on the keyboard. This has the effect of redrawing the feature on the Map Canvas.
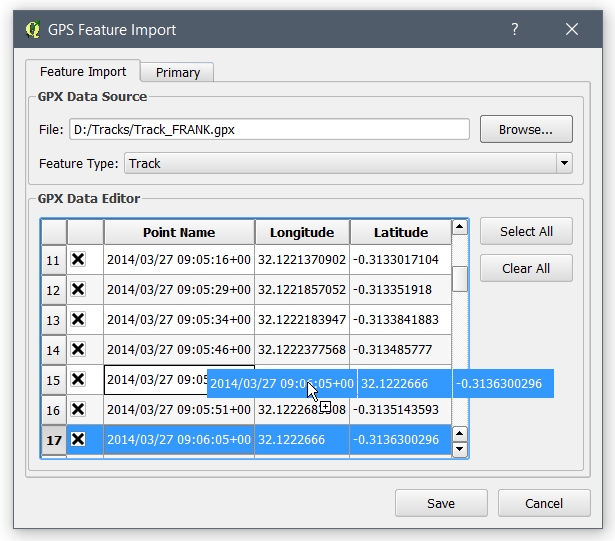
If you want to sort the order of the Points, you can use the drag and drop feature. To sort the points, select a Point you would like to move. While clicking on the selected row/ Point, move your cursor to make the row float. You can now move it with your cursor and drop it in a row you want it to be moved as shown in the image below.
7. Once you finish choosing the points, click on the Primary tab to add attribute information as shown in the image below.
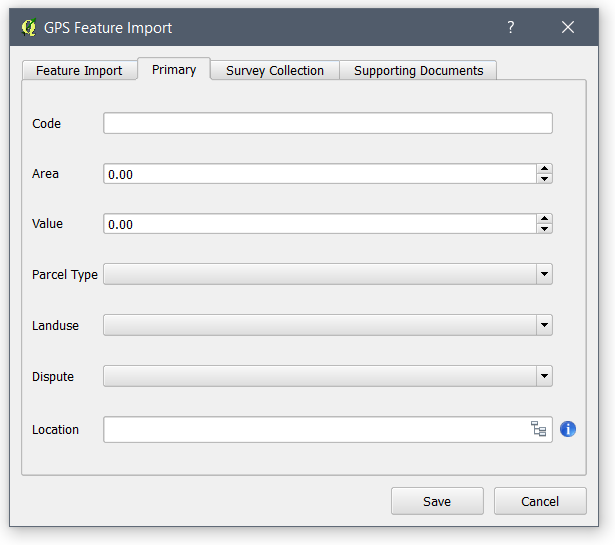
Fill out the form with relevant information uploaded supporting documents if needed. You can also upload supporting documents. Using the Collection tab, you can link the record to a related entity if the entity is referenced by another entity. For more in working with Entity Editor, review Adding a Record topic.
Once done, click on the Save button to add the feature into the spatial entity with its attribute data added using the form.
A success message, as shown in the image below, pops up.
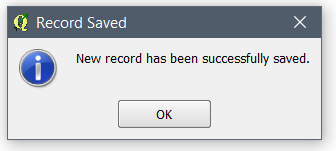
Click on the OK button on the message box. This will take you back to the Feature Import tab where you can edit, check or uncheck previously uploaded GPX data points. You can as well at this point select different Feature Type or upload a new GPX file altogether. You can also click on the Cancel button of the GPS Feature Import dialog to close the window, when you finish importing GPS Features. You can check the result by viewing the added feature in the map canvas and its attribute data in the entity browser.
If the feature is a Line, a line will be drawn when the user selects the corresponding vertexes comprising the line feature.
Similarly, for a Point feature, only one point is selectable to import to STDM database.
Note: If you wish to learn about the feature but lack a .gpx file, you can use the STDM Sample data gpx files. The sample data is located in .stdm folder under your user folder inside SampleData/Sample_GPX_Data folder.