 and double click to run it. If you are using the custom build, downloaded
from STDM website, click on the QGIS Desktop icon
and double click to run it. If you are using the custom build, downloaded
from STDM website, click on the QGIS Desktop icon  to start.
Note: Make sure QGIS is started and running while STDM is visible in QGIS interface tool bar.
To start QGIS, look for this Icon
and double click to run it. If you are using the custom build, downloaded
from STDM website, click on the QGIS Desktop icon
to start.
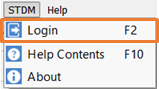
1. Click the login
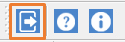
menu located under the STDM Menu or the login button located under the STDM toolbar, as highlighted below.
Login menu:
Login button:
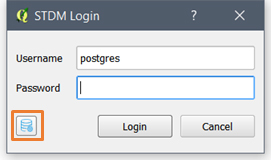
A login dialog will pop up. You are required to provide login credentials using the default user (postgres) created during installation of the software.
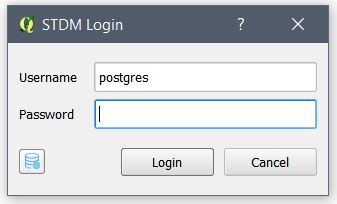
a. Username: The default username is postgres without quotes. An administrator can create user accounts for new users.
b. Password: Provide the password used when installing STDM using the Bundled Installer or the one created by the system administrator.
If you have installed the required software separately, use the password that you used to login to PostgreSQL database server.
Note: If you are intending to use STDM in a network environment, request the system administrator for username and passwords.
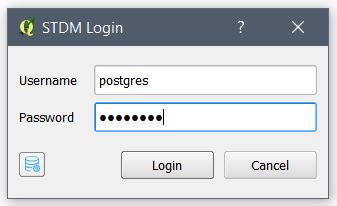
2. Then, click on Login button or hit the Enter button on the keyboard.
The cancel button closes the login dialog and stops the login process.
3.When successfully logged in, you will see the full STDM toolbar as shown below.

In addition to logging in to the default STDM database as shown above, you can always change the database settings to login to a different database. This is also possible in the Options module after login as discussed in the Options topic.
To change database properties, follow the steps below.
1. Click on the database icon located in the login dialog as highlighted below.
2. A PostgreSQL Database Connection dialog pops up as shown below.
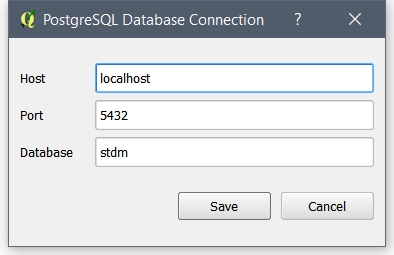
The PostgreSQL Database Connection loads with the currently used properties.
a. Host refers to the location of a computer that has hosted the database server (PostgreSQL). If the database server is installed in your own computer, you have to enter localhost as shown above. However, when PostereSQL that holds the database is installed in an office network, the IP address will be different from localhost. It could be a number like 192.168.0.23 or any other number with such format as specified by the system administrator. This is relevant when STDM is installed for governmental or non-governmental organizations with a centralized database server.
b. Port refers to an endpoint of communication for the database server (postgreSQL). To access the database from STDM, we need to know its port. The most common port values for PostgreSQL are 5432, 5433, or any other port as specified during installation.
c. Database refers to a storage location in which the entire data of STDM is stored. By default, during installation, it is set as stdm. You can enter any other database that you want to connect to after installation using PostgreSQL administration software called pgAdmin III. If you want to use your own database, make sure the PostGIS extension is installed and added to the database that STDM uses. Otherwise, STDM cannot run.
3. After making changes to the database properties, click on the Save button.
If you do not want your changes to be saved, press the Cancel button. Clicking on both buttons results in the closing of the dialog.
4. You can now login to the new database that you have specified.
When you login to STDM for the first time you will see the following.
1. A request to agree with STDM Terms and Conditions.
2. A request to run the Configuration Wizard with a dialog shown below.
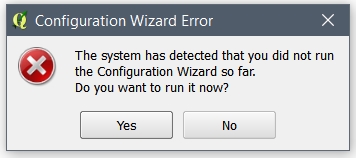
The Configuration Wizard enables you to set STDM used folders, create profiles, create database tables for entities, columns, lookup tables, and Social Tenure Relationship that are required by most STDM modules. The Configuration Wizard is discussed under Creating and Customizing STDM Profiles topic starting with Getting Started with the Configuration Wizard topic.
You can also use the default profiles of STDM. In this case, you just need to click on the Next button of the Configuration Wizard until you reach the last page of the wizard. Then click on the Finish button to create the database tables and save the settings.
It is recommended to click on the Yes button that will start the Configuration Wizard.
If you choose not to run the Configuration Wizard by clicking on the No button, you cannot access most of the modules as they rely on the database tables in STDM.
Note: This is not applicable for users migrating from older versions of STDM.
3. If you have no database table for a module you are trying to open, a Database Table Error that looks like the one below is shown. The missing table specified depends on the module you are trying to launch.

To fix this, you can click on the Yes button to start the Configuration Wizard.