One way of adding a new record in a spatial entity such as spatial unit, is by digitizing a feature using a base map imagery. The other ways of adding a new record are by importing a spatial data and by importing a GPS data.
Ensure the Imagery or base map layer is added on QGIS map canvas. To add an imagery data, follow the steps on Adding Imagery data topic.
The following steps explain how to digitize a polygon that could be a plot, parcel, structure and any other area.
You can digitize line or point using similar steps.
1. Add an imagery data as explained in Adding Imagery data topic.
2. Then add a spatial entity layer in to QGIS Map Canvas that you wish the new polygon to be added to.
To add a spatial entity layer follow the steps in Add a Spatial Entity Geometry topic.
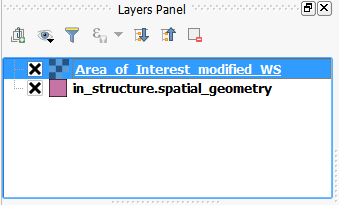
3. Once the layers are added, you will see them listed as the image below. Make sure the spatial entity layer is above the imagery. Select and drag and drop to change their order.
The correct order is the spatial entity layer at the top and the imagery below it, as shown in the image below. This is needed so that the spatial entity geometry is not hidden under the imagery.

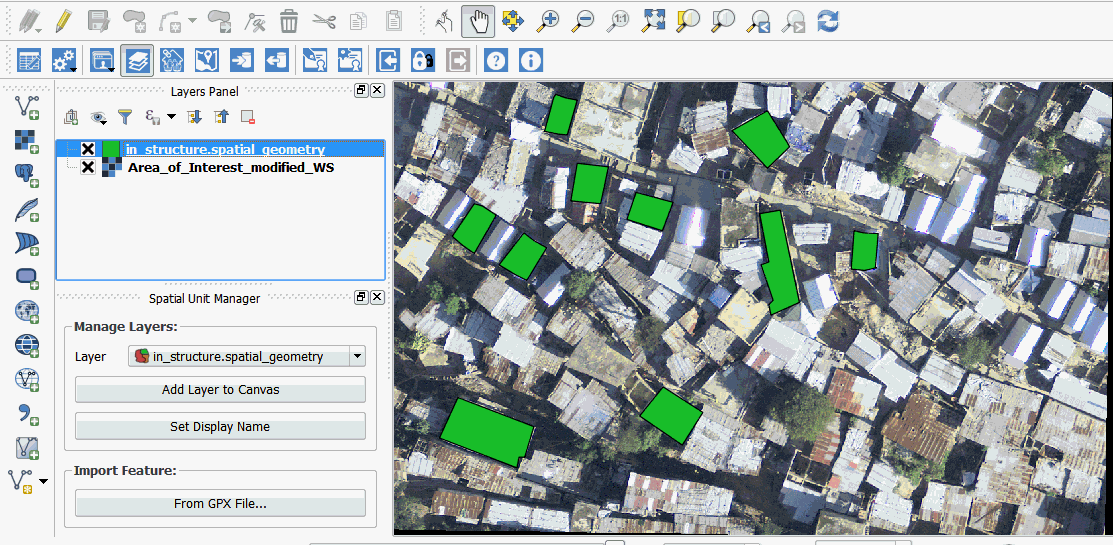
4. Select the spatial entity layer to digitize features into, as shown below.
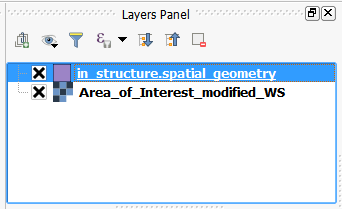
This results in the placement of the spatial entity geometry above the imagery as shown in the image below.
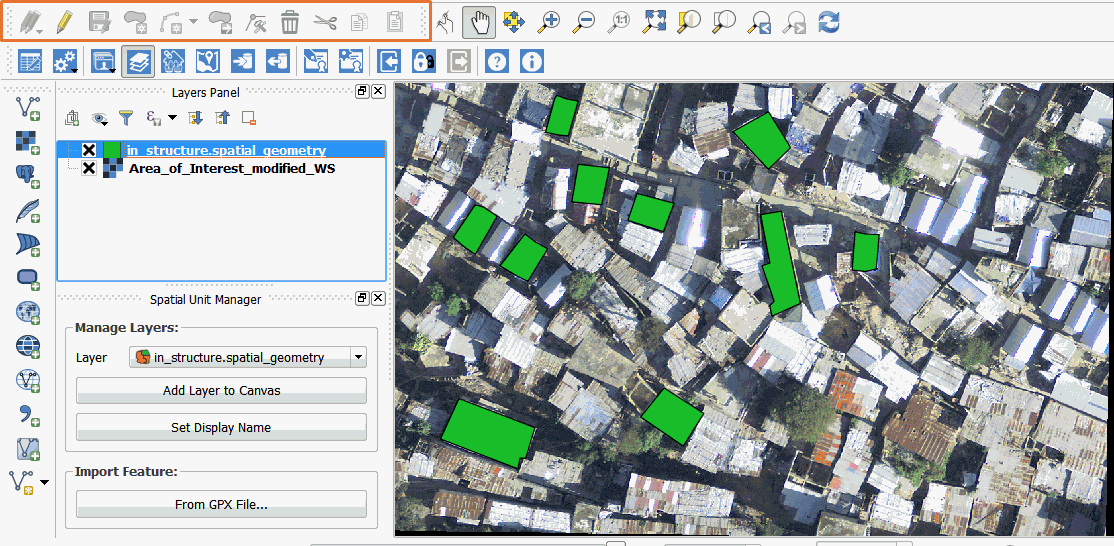
5. Locate the Digitizing Toolbar of QGIS that is highlighted in the image below.
6. Click the Toggle Editing tool in the Digitizing Toolbar as highlighted below. This will turn your selected layer to edit mode.

7. The Toggle Editing tool enables most of the digitizing tools. Select the Add Feature Tool as highlighted below.

8. Find an area on top of which you would like to add a feature. This could
be a demarcated plot, a house, etc.
9. Zoom close to the area you wish to digitize and start clicking on one of the corners of the area. Then, move your cursor to the next corner and click on the next corner.
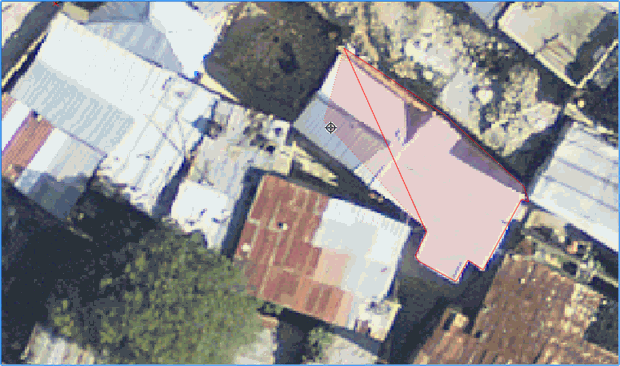
Do the same for all the corners in the area.
Once you are done clicking on all corners. Right-click on the area.
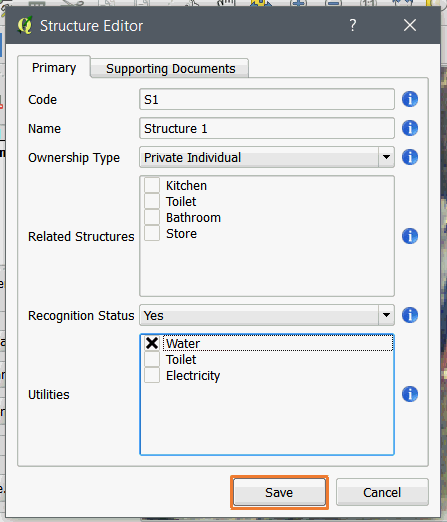
10. A spatial entity form pops up, allowing you to input attribute data on the feature as shown below.
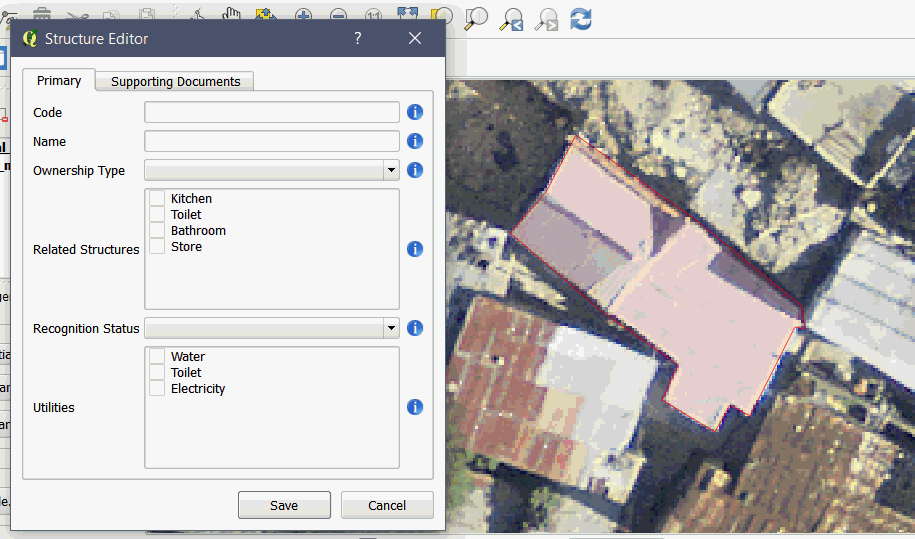
Fill out the form and click on the Save button as shown below.
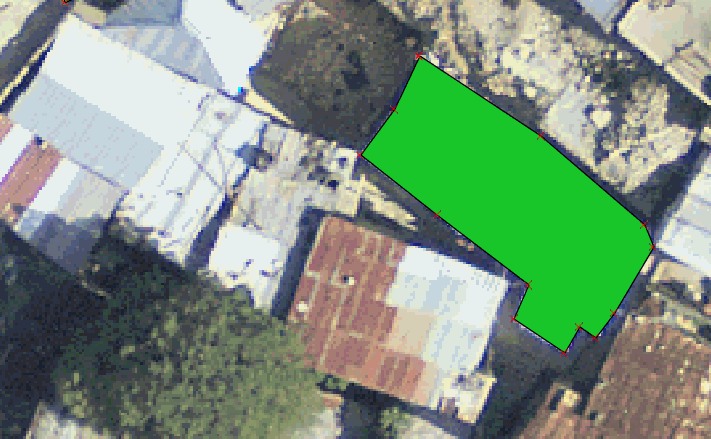
This will save the data temporarily until you click on the Save button in the digitizing toolbar. When saved, the digitized feature appears on the layer as shown below.
Continue adding more features. by repeating Steps 9 and 10.
11. Save your work into STDM database. Your digitized features will only be added into the STDM database when you click on the Save button in the Digitizing toolbar as highlighted in the image below.

12. End your editing session by clicking on the Toggle Editing tool as highlighted below.

This will disable all tools as shown below.

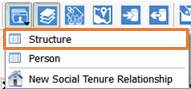
Check your saved data by going to the Entities menu and by selecting the Spatial Entity Menu.
This opens your spatial entity Browser. Search for the latest record as shown below.
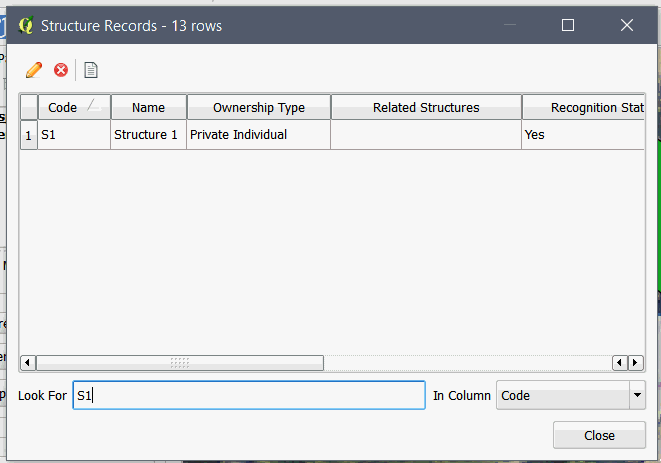
In the Entity browser, you can select the record and edit the attribute data.
Tips:
Undo a selection of a corner: To undo a selection of a corner while digitizing, press the Backspace button on your keyboard.
Undo feature creation: To undo a feature creation, that temporarily removes a feature from the layer, click on the Undo button on QGIS Edit Menu.
Redo feature creation: To redo a feature creation, that temporarily restores a feature from the layer, click on the Redo button on QGIS Edit Menu.
Cancel current digitized feature: Press the Escape (Esc) button on your keyboard to stop digitizing and cancel what you have started.